Author Topic: 47 Bodied Project Starts - Slightly Delayed. Big pile of bits to sort out.  (Read 21088 times)

0 Members and 1 Guest are viewing this topic.

Offline StrawberryCheesecake

  • Sr. Member
  • ****
  • Joined: May 2015
  • Location: uk
  • Posts: 281
Re: 47 Bodied Project Starts - Slightly Delayed. Big pile of bits to sort out.
« Reply #75 on: Wednesday,March 09, 2016, 10:31:31 PM »
 Thanks Guys  - I'll have a look. I was obviously looking at the wrong bit of the online manual. I didn't find those dimensions.

Offline StrawberryCheesecake

  • Sr. Member
  • ****
  • Joined: May 2015
  • Location: uk
  • Posts: 281
Re: 47 Bodied Project Starts - Slightly Delayed. Big pile of bits to sort out.
« Reply #76 on: Sunday,January 01, 2017, 07:59:22 AM »
Hi All

I've not posted much on here of late, but I've been fairly busy. Some of you might have seen these updates on Facebook.

So, I've painted most of the body. This is the first time I've attempted a multi-colour paint job, and I don't plan to do it again for a while!


As I had a new shell, and fibreglass is hydroscopic, I wanted to do the underside of the car, as well as the more visible areas. The car is in a mate's barn, and I was house/cat sitting while he was on holiday, so I cracked on with that.

Etch primer on the ally bits.
Plastic primer on the fibreglass
Wet-on-wet primer and 2k White colour coat.

I went with white because it reflects more light when you're working on the car, and shows up leaks / damage easily.

I also did a bit of repair work on the floor before I started - looks like the floor was damaged by being dragged around before I got the car. It also needed some reinforcement as it's only about 2mm thick. More on that later. The A pillars were very weak and flexible, so I reinforced those too - plastic plumbing pipe and fibreglass layered over the top.


Underside first - it's resting on some old tyres.


Then the front and rear bays

The pale yellow is etch primer


Wet on wet primer


First coats of colour


The dark grey primer tends to show through the white. OK for the underside, but I found some slightly lighter primer for the upper body.


Reinforcing the floor - kevlar/carbon weave and epoxy resin.


And the pillars - early and mid process. They've been cleaned up with the angle grinder and sander now obviously.


« Last Edit: Sunday,January 01, 2017, 08:01:33 AM by StrawberryCheesecake »

Offline StrawberryCheesecake

  • Sr. Member
  • ****
  • Joined: May 2015
  • Location: uk
  • Posts: 281
Re: 47 Bodied Project Starts - Slightly Delayed. Big pile of bits to sort out.
« Reply #77 on: Sunday,January 01, 2017, 08:13:47 AM »
Upper body.

It's going to be gold leaf colours, but the first thing I did was to prime it and paint it all white, to get a uniform surface.

I had a couple of issues on the way. I high-build primed the car, and blocked back, filling the pin holes that appeared along the way. Then the plan was to wet on wet prime the car and go straight on with colour. Unfortunately I made a bit of an arse of that and ended up with a lot of runs in the primer, so I had to block that back as well. Fun fun fun!

This is the first primer stage, rubbed back, filled, rubbed back, etc. As you'd expect from a handmade body, there were a lot of high and low spots to sort out, which the guide coat on top of the primer shows up.


First attempt at the wet on wet primer, botched and rubbed down again.


Finally some colour after all that hard work... first real coat after the initial dust coat (helps adhesion and reduces the risk of reactions)


White coats done


After flatting any orange peel and runs out of the white (there were a couple of blow-ins in between as well), careful masking and measuring to try to get the line straight,  then the first dust coat and 2nd  light coat of red


More coats


De-masked


Offline StrawberryCheesecake

  • Sr. Member
  • ****
  • Joined: May 2015
  • Location: uk
  • Posts: 281
Re: 47 Bodied Project Starts - Slightly Delayed. Big pile of bits to sort out.
« Reply #78 on: Sunday,January 01, 2017, 08:19:34 AM »
Similar process to prep the front and rear lids (filling pin holes and hollows, high build primer and block back, then more filling where there are still issues.

Yesterday I painted them with the wet on wet primer and then the colour coat - 4 coats of each (Dust + 3). I think I doubled the weight of the front lid, which is very light, as it's carbon/kevlar mix, and very thin.


Unusually for me, I don't think I got any runs in it....


Of course, the problem with painting in a 'barn booth' as opposed to a real paint booth with extraction, is you get more dirt in the paint, which needs to be flatted and polished out. That's why I tend to use 4 coats rather than 3, to give more thickness to work with. 

Lots still to do, but it's coming along. I did a lot of filler and blocking back on the doors as well, before I painted the lids yesterday. Next job is to paint them in primer and then white.

Gold stripe round the middle still to do as well... and will probably lacquer over the whole lot to smooth out the joins.

« Last Edit: Sunday,January 01, 2017, 08:22:20 AM by StrawberryCheesecake »

Online BDA

  • Super Member
  • *******
  • Joined: Jul 2012
  • Location: North Carolina
  • Posts: 9,515
Re: 47 Bodied Project Starts - Slightly Delayed. Big pile of bits to sort out.
« Reply #79 on: Sunday,January 01, 2017, 10:05:34 AM »
She's looking great! Just gorgeous!

I hope you had the windscreen in place when you stiffened the A pillars otherwise there is a chance that it might not fit properly (given that it's a Lotus, "properly" is a vague term). My windscreen may not be a structural member but it certainly defines the position of the A pillars and the leading edge of the roof.

Offline skoolsen

  • Jr. Member
  • **
  • Joined: Feb 2014
  • Location: Norway
  • Posts: 50
Re: 47 Bodied Project Starts - Slightly Delayed. Big pile of bits to sort out.
« Reply #80 on: Sunday,January 01, 2017, 12:18:56 PM »
Great work!
Soon going to paint my own, so this is inspiring to see.
0581R

Offline StrawberryCheesecake

  • Sr. Member
  • ****
  • Joined: May 2015
  • Location: uk
  • Posts: 281
Re: 47 Bodied Project Starts - Slightly Delayed. Big pile of bits to sort out.
« Reply #81 on: Sunday,January 01, 2017, 01:32:00 PM »
She's looking great! Just gorgeous!

I hope you had the windscreen in place when you stiffened the A pillars otherwise there is a chance that it might not fit properly (given that it's a Lotus, "properly" is a vague term). My windscreen may not be a structural member but it certainly defines the position of the A pillars and the leading edge of the roof.

I didn't have a windscreen at the time, so I took the risk. Fair point though - I did wonder about it.

Like all barn paint jobs, it looks better from 10-20 feet away, but I reckon with a bit of work it'll be grand.

Offline StrawberryCheesecake

  • Sr. Member
  • ****
  • Joined: May 2015
  • Location: uk
  • Posts: 281
Re: 47 Bodied Project Starts - Slightly Delayed. Big pile of bits to sort out.
« Reply #82 on: Sunday,January 01, 2017, 01:33:04 PM »
Great work!
Soon going to paint my own, so this is inspiring to see.

Go for it... take your time and use plasticiser in the paint, if you can get 2K paint over there. Which part of Norway are you in? I've spent a bit of time in Oslo and Tromso.

Offline skoolsen

  • Jr. Member
  • **
  • Joined: Feb 2014
  • Location: Norway
  • Posts: 50
Re: 47 Bodied Project Starts - Slightly Delayed. Big pile of bits to sort out.
« Reply #83 on: Sunday,January 01, 2017, 09:22:10 PM »
I am in Horten, it is one hour drive south from Oslo.
We can get 2k paint here, have to check the plasisicer tough .
Thanks and keep up with the good work.
0581R

Offline Certified Lotus

  • Super Member
  • *******
  • Joined: Aug 2016
  • Location: Princeton, NJ
  • Posts: 1,686
Re: 47 Bodied Project Starts - Slightly Delayed. Big pile of bits to sort out.
« Reply #84 on: Monday,January 02, 2017, 02:49:22 AM »
Look great! A nice careful wet sanding will smooth things out and bring a very nice finish out. I've never painted an entire car in a garage, but have painted the bonnet and front clip of an Elan. Bugs and dust are an issue.....wet sanding solves very well.

Offline StrawberryCheesecake

  • Sr. Member
  • ****
  • Joined: May 2015
  • Location: uk
  • Posts: 281
Re: 47 Bodied Project Starts - Slightly Delayed. Big pile of bits to sort out.
« Reply #85 on: Wednesday,January 04, 2017, 02:20:22 AM »
I am in Horten, it is one hour drive south from Oslo.
We can get 2k paint here, have to check the plasisicer tough .
Thanks and keep up with the good work.

I expect you can get it, as it's normally used for painting plastic bumpers. It should help the paint flex with the body. I used a plastic primer first - I think it's basically glue- before the primer.

Offline StrawberryCheesecake

  • Sr. Member
  • ****
  • Joined: May 2015
  • Location: uk
  • Posts: 281
Re: 47 Bodied Project Starts - Slightly Delayed. Big pile of bits to sort out.
« Reply #86 on: Wednesday,January 04, 2017, 02:22:27 AM »
Look great! A nice careful wet sanding will smooth things out and bring a very nice finish out. I've never painted an entire car in a garage, but have painted the bonnet and front clip of an Elan. Bugs and dust are an issue.....wet sanding solves very well.

Not so many bugs in winter, but there's plenty of dust, especially as the sanding is being done in the same space. I vacuum it up before painting top coats, but it's all over the walls and sheeting now.

Offline StrawberryCheesecake

  • Sr. Member
  • ****
  • Joined: May 2015
  • Location: uk
  • Posts: 281
Re: 47 Bodied Project Starts - Slightly Delayed. Big pile of bits to sort out.
« Reply #87 on: Thursday,February 02, 2017, 03:13:09 PM »
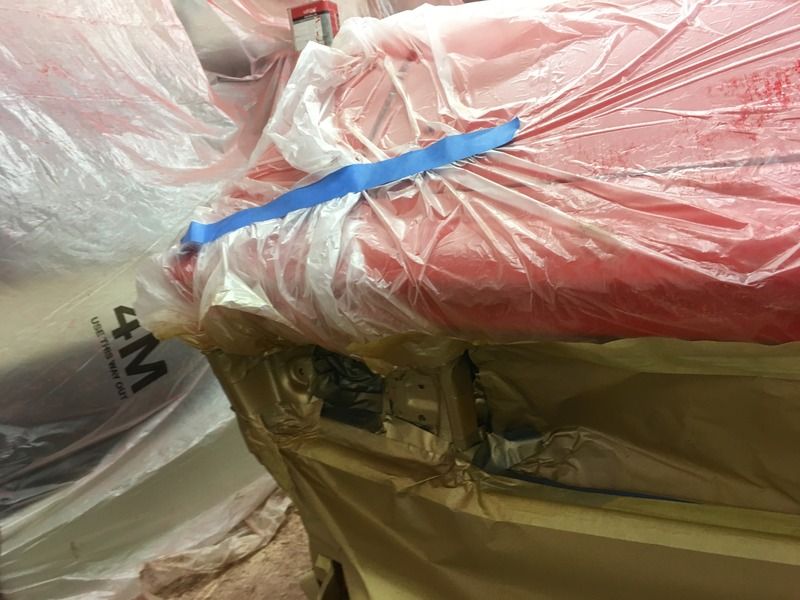
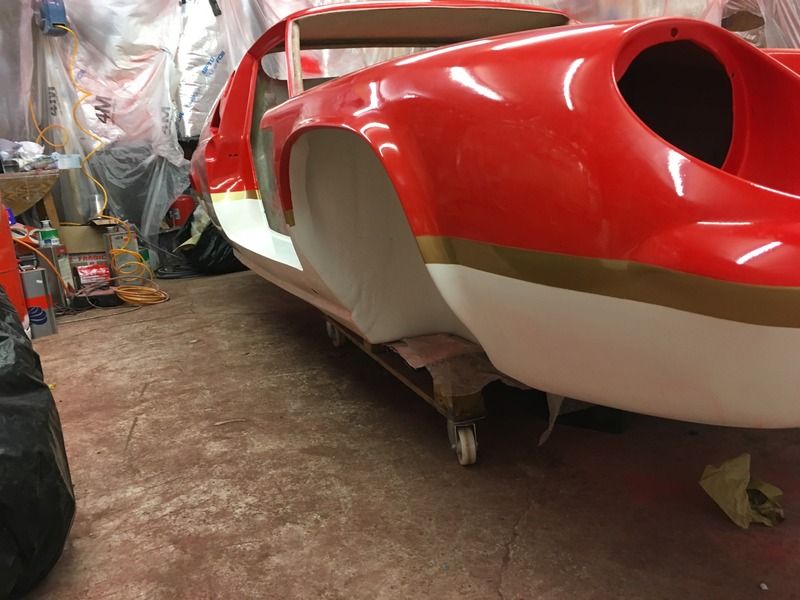
So I took a sharp intake of breath, spent most of a day masking, and painted the gold stripe. I went down the paint shop and found a paint chip that was a close match to my powder coated revolution alloys, so hopefully it'll all look right when it's put together.

I started with 3mm edge tape aligned with the edge of the red paint, then used a strip of 1.5" masking tape to get a consistent width of stripe, and put the next 3mm edge tape the other side of that. The 3mm plastic edge tape makes it much easier to follow the corners without the tape buckling, and then I went over the top with normal masking tape to stick it down properly. I started with 9mm edge tape, but it wasn't following the curves properly

I bought a new mini spray gun for doing blow-ins, and used it for the gold, as it seems to have great atomisation, and is very controllable. It's an ANI gun from spray guns direct, and only cost about £30 including postage.

First coat of gold base coat - a light dust coat to help avoid reaction from the thinners attacking the paint underneath, which I let dry off completely.

Then it got another 3 or 4 coats of base coat (can't remember) and the same process for lacquer - dust coat + 3 normal coats. I've tried to avoid going too heavy as it'll create a bigger step between the colours.

Once the car is built I will make good any paint repairs that are needed (I fully expect to scratch it along the way, and lacquer over the whole lot to try and hide the join between the colours a bit.

I'm using about 10% or a bit more plasticiser in the 2k solid colours and the lacquer, but not in the solvent base coat.

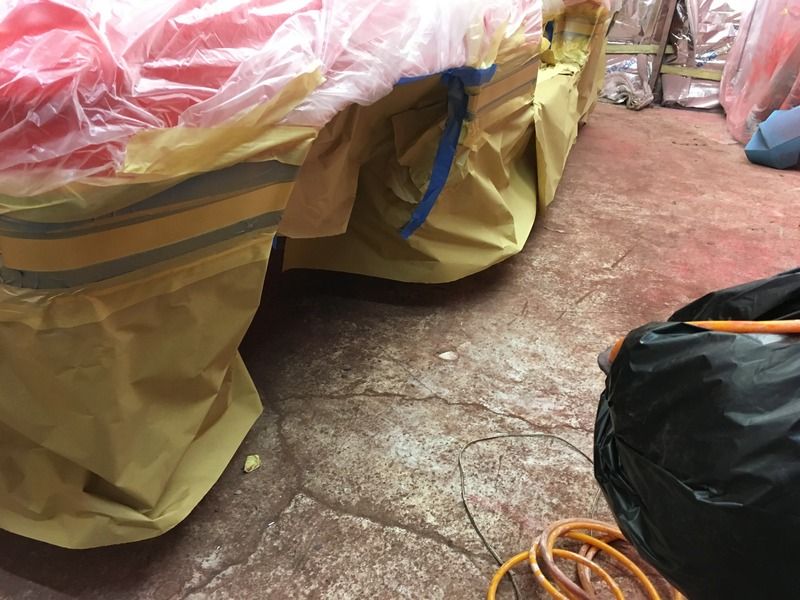
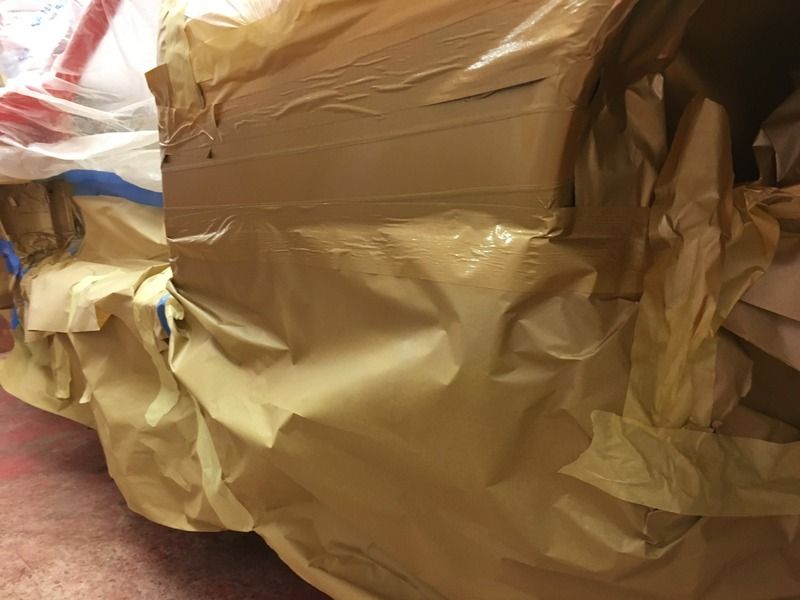
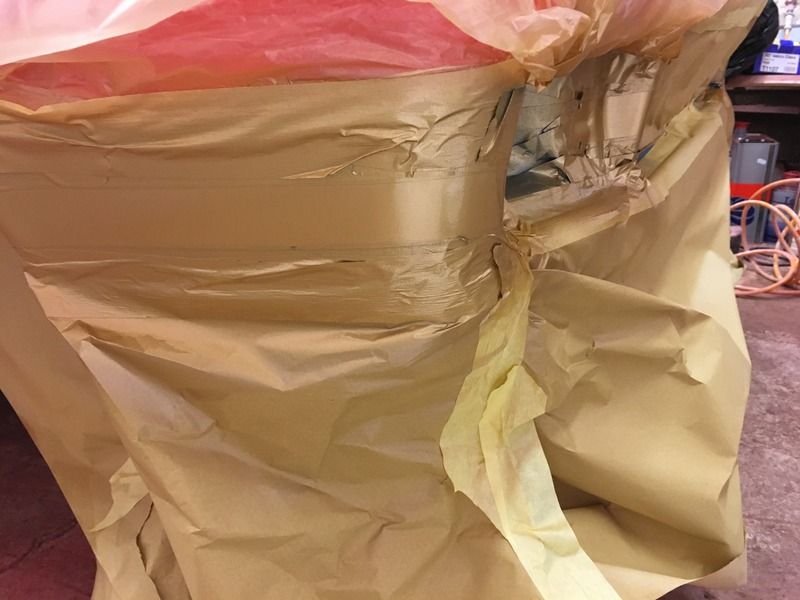
Some random pics showing some progression through the job.


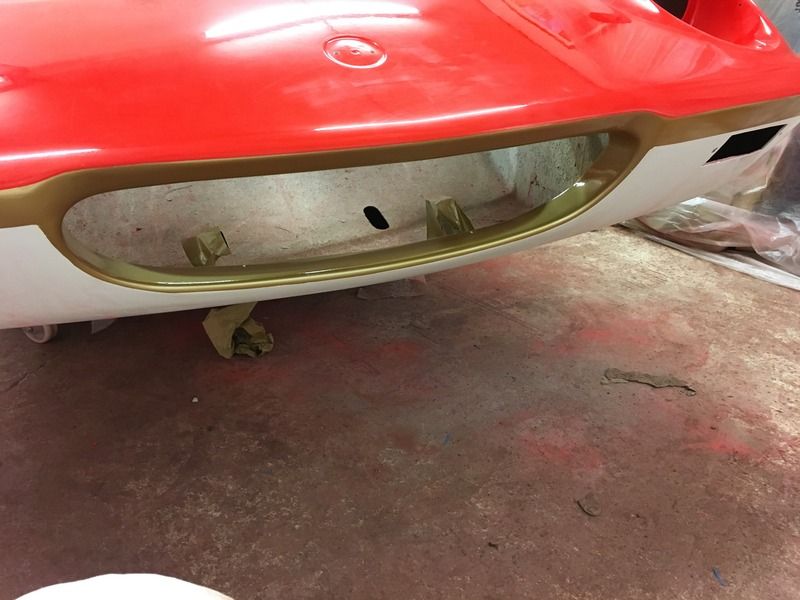
I decided to give it a gold mouth... I have plans for a custom mesh grill job as well. Black background with gold teeth... not completely sure if I'll do it though.


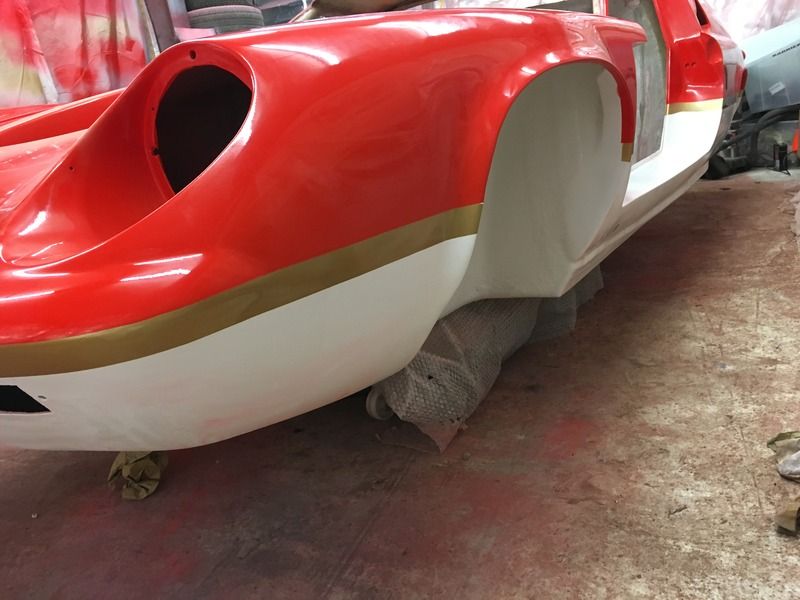
These ones are with the first 1.5 coats of lacquer, I think.


Finally de-masked. Overall, I'm pretty happy with it, but there are a few little faults to correct - mostly little gaps between the red and the gold, where there's a thin sliver of white showing through. It's less than 0.5mm in most cases, but it'll still annoy me if I don't fix it. :D One side of the mouth isn't quite right either.


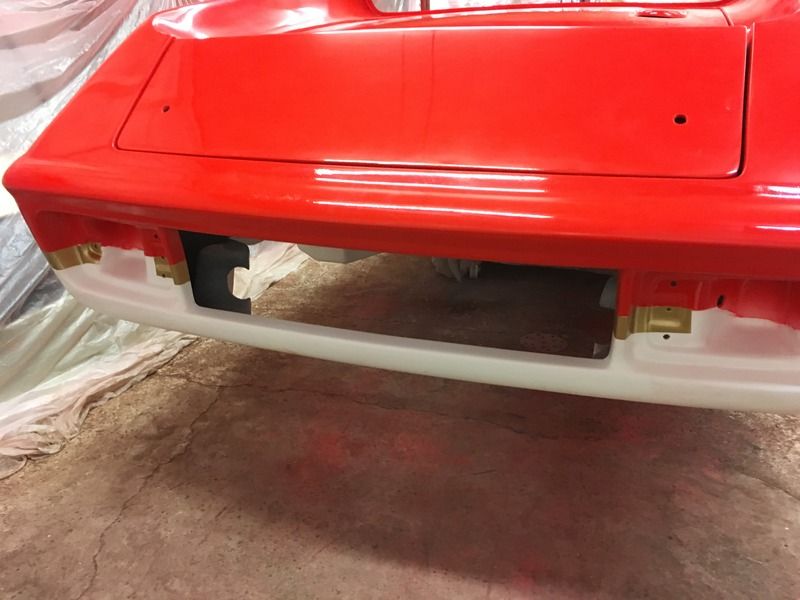
I'm really pleased with the surface finish from the new gun - I'm not going to bother with flatting and polishing, because it came out very consistent and without any orange peel worth worrying about. Just got to fix the white 'bikini lines'.


« Last Edit: Thursday,February 02, 2017, 03:16:21 PM by StrawberryCheesecake »

Online BDA

  • Super Member
  • *******
  • Joined: Jul 2012
  • Location: North Carolina
  • Posts: 9,515
Re: 47 Bodied Project Starts - Slightly Delayed. Big pile of bits to sort out.
« Reply #88 on: Thursday,February 02, 2017, 05:20:59 PM »
You did a great job, Strawberry! She's really going to be a beauty!

Offline EuropaTC

  • Super Member
  • *******
  • Joined: Jun 2012
  • Location: Lincolnshire, UK
  • Posts: 3,015
    • LotusLand
Re: 47 Bodied Project Starts - Slightly Delayed. Big pile of bits to sort out.
« Reply #89 on: Thursday,February 02, 2017, 11:20:27 PM »
For DIY spraying in the UK in February I think you've done a great job, I wouldn't even consider trying it under winter conditions. Have you got heating in your workshop ?

Also thanks for the spraygun link, they've got a decent range with some good prices there and it's nice to see someone advertising spare parts as well. 

Brian