Author Topic: new member  (Read 65267 times)

0 Members and 1 Guest are viewing this topic.

Offline rascott

  • Full Member
  • ***
  • Joined: Dec 2014
  • Location: california
  • Posts: 249
Re: new member
« Reply #330 on: Tuesday,August 30, 2016, 09:07:02 PM »
my "fish season" is pretty much over, and the suzuki took me to several new places(and back). she performed well, and is now down for inspections and refit planning(for next season).
"the lotus" occupies the service bay.
clutch service, seal replacements, rear suspension fixes, and some bodywork is figured for this run.
got my engine hoist set up and a strategy formulated, and am draining fluids.......
it will be interesting to see what this looks like w/no drivetrain.
back at it.
richard

Offline rascott

  • Full Member
  • ***
  • Joined: Dec 2014
  • Location: california
  • Posts: 249
Re: new member
« Reply #331 on: Saturday,September 10, 2016, 10:09:42 AM »
took a while, but finally got all the fluids drained, and enough things removed or disconnected.......
decided to block the rear, as the recommended stand positions interfered with my engine hoist.

tackled the unit with a makeshift sling.

it didn't balance as hoped, but nothing got damaged......

the trailing arms articulate more than i expected.
it all looks like it needs attention.

Offline rascott

  • Full Member
  • ***
  • Joined: Dec 2014
  • Location: california
  • Posts: 249
Re: new member
« Reply #332 on: Saturday,September 10, 2016, 09:02:46 PM »
haha.
my engine stand.......

haven't broken anything yet.
dealing with years of gunk.
figure on replacing the crank seal, and the input shaft seal(must research) since every other seal i've seen has been rock hard.
i have output shaft seals to change, also.
the motor needs a couple of manifold studs repaired.
i should do some bulkhead repairs, while the drivetrain is out, but mabe not.

Offline rascott

  • Full Member
  • ***
  • Joined: Dec 2014
  • Location: california
  • Posts: 249
Re: new member
« Reply #333 on: Sunday,September 11, 2016, 01:20:10 PM »
i have never seen a clutch release(clutch withdraw pad) arrangement like this.
the manual says to remove the "fork retaining pins" with a special tool, so they are just driven into place?
also- "only fit splined pins B under repair", and i appear to have the cylindrical pins.
i've been considering trying a nail puller for removal, but perhaps there is a better way?
here is a picture, and i daubed some red paint on the pins i  believe are the ones.........

looks like i need to remove the bell housing(clutch housing) to access the input shaft seal, and possibly drill some hole in the "bottom of the withdrawl pad guide(?).......and apparently will need to modify the release bearing mount to fit the new bearing?
hmmmm.

l8tr.....
pulled the bell housing. is the gasket required for reassembly, or can i use a sealant instead?
« Last Edit: Sunday,September 11, 2016, 05:47:12 PM by rascott »

Offline Roger

  • Sr. Member
  • ****
  • Joined: Aug 2012
  • Location: Richmond, Texas
  • Posts: 400
Re: new member
« Reply #334 on: Sunday,September 11, 2016, 07:47:52 PM »
You cant get a gasket anyway, use your favourite sealer.
You can remove the thrust bearing without removing the pins, and you can get the oil seal out, but as you have already got the bellhousing off, never mind.
I drilled 2 small holes and drifted the pins out, then tapped the holes for 1/4 UNC and fitted a couple of grub screws (set screws in US) with red loctite.
And I've seen others like that.

Offline rascott

  • Full Member
  • ***
  • Joined: Dec 2014
  • Location: california
  • Posts: 249
Re: new member
« Reply #335 on: Sunday,September 11, 2016, 08:24:59 PM »
thanks for that, roger.
it looked like i could get away with using a sealant.
i believe i understand my mistake in removing the bell housing........should have realized i'd be looking in the gearbox, but thought the manual indicated removal.... oh well.
those pins seem like an odd way to fit that bearing, and i haven't started destroying them yet.
they must be pretty hard stuff to not act as a shear pin.
i'll see what you mean about grub screws- makes sense.

Offline jbcollier

  • Super Member
  • *******
  • Joined: Nov 2013
  • Location: Edmonton, Alberta, Canada
  • Posts: 5,810
Re: new member
« Reply #336 on: Monday,September 12, 2016, 09:11:53 AM »
Why do you want to remove the clutch release fork pins?  The only reason to remove the pins is to replace the release fork, pivot pin or pivot pin bushings.

You can change the clutch release bearing, no problem, with the pins/fork in place.

Offline Roger

  • Sr. Member
  • ****
  • Joined: Aug 2012
  • Location: Richmond, Texas
  • Posts: 400
Re: new member
« Reply #337 on: Monday,September 12, 2016, 10:10:59 AM »
Why do you want to remove the clutch release fork pins?  The only reason to remove the pins is to replace the release fork, pivot pin or pivot pin bushings.

You can change the clutch release bearing, no problem, with the pins/fork in place.

Also, if you need to replace the spring, you need to remove the fork and cross shaft.

Offline rascott

  • Full Member
  • ***
  • Joined: Dec 2014
  • Location: california
  • Posts: 249
Re: new member
« Reply #338 on: Monday,September 12, 2016, 07:20:22 PM »
been trying to get a grip on this release bearing thing, but have not deciphered the workshop manual.
it indicates unpinning the fork from the shaft, to allow it to swing off the guide enough to drop the bearing assembly(?), it gives no hints on another method....
i have a clutch kit(frm rd ent.), and the release bearing seems to be fit on the bearing carrier somehow.
please describe removal?

Offline Grumblebuns

  • Super Member
  • *******
  • Joined: Aug 2012
  • Location: San Diego area
  • Posts: 1,483
Re: new member
« Reply #339 on: Wednesday,September 14, 2016, 06:40:23 AM »
took a while, but finally got all the fluids drained, and enough things removed or disconnected.......
decided to block the rear, as the recommended stand positions interfered with my engine hoist.

tackled the unit with a makeshift sling.

it didn't balance as hoped, but nothing got damaged......

the trailing arms articulate more than i expected.
it all looks like it needs attention.

When you re-install the engine, consider stuffing the engine in from the bottom, smaller chance of damage to the body work should the engine shift while in the air.


Offline rascott

  • Full Member
  • ***
  • Joined: Dec 2014
  • Location: california
  • Posts: 249
Re: new member
« Reply #340 on: Thursday,September 15, 2016, 07:35:39 PM »
so anyway, i have made some progress on the clutch part of the project.
i have the crank seal, input shaft seal, and proper replacement fork pins on the way.
rummaging thru my pulling type tools, and seeing if i can make something to draw those fork pins out.
i pulled the dead release bearing off of the carrier, but.....
did i mention i'm using luk clutch parts? the release bearing has a smaller i.d., so the carrier needs to be modified.
just casting the net to see if anyone had clever methods of removing those pins.........

i'll report developments, but i figure to fiddle with those pins for a while before resorting to roger's(quite reasonable) "workaround".
leave it to me to make a project last longer.

Offline rascott

  • Full Member
  • ***
  • Joined: Dec 2014
  • Location: california
  • Posts: 249
Re: new member
« Reply #341 on: Friday,September 16, 2016, 05:54:00 PM »
tried a couple of pulling techniques on those clutch fork pins, without damaging or removing them.
then i cut a tab off of the bell housing, to allow the clutch lever more movement.
don't know what may have fastened to that tab, but it had been broken off in the past, so it must not have been critical.
the release bearing carrier is easy to remove now.

this is the input shaft seal i intend to replace.

i think this is some progress.
what's with that weird grease/sludge/crud that builds up in bellhousings? requires pretty potent solvents to remove....messy.

mo'gress091916
release bearing carrier is at the machine shop for modification- should have it back in a couple of days.
replaced the transmission input shaft seal, and can put the bellhousing back on.
hid some rust on the framework.

keptiup092016
found time to replace crank seal and pilot bearing, so can put flywheel back on....
i am pleased.
« Last Edit: Tuesday,September 20, 2016, 10:03:24 PM by rascott »

Offline rascott

  • Full Member
  • ***
  • Joined: Dec 2014
  • Location: california
  • Posts: 249
Re: new member
« Reply #342 on: Thursday,September 22, 2016, 06:31:04 PM »
installed the release bearing on the modified carrier.

now i can put more together.

motrwk092416
managed to make a threaded hole in place of the broken manifold stud. this is one of two that had been thru some onboard removal attempts. the next one has an "easyout", broken, offcenter, and should be real messy.
oh well.

whew100116
managed to install a helicoil in a real messy hole to repair the other broken manifold stud.
ate up about $60 of drill bits.
i feel reasonably confident this will work.
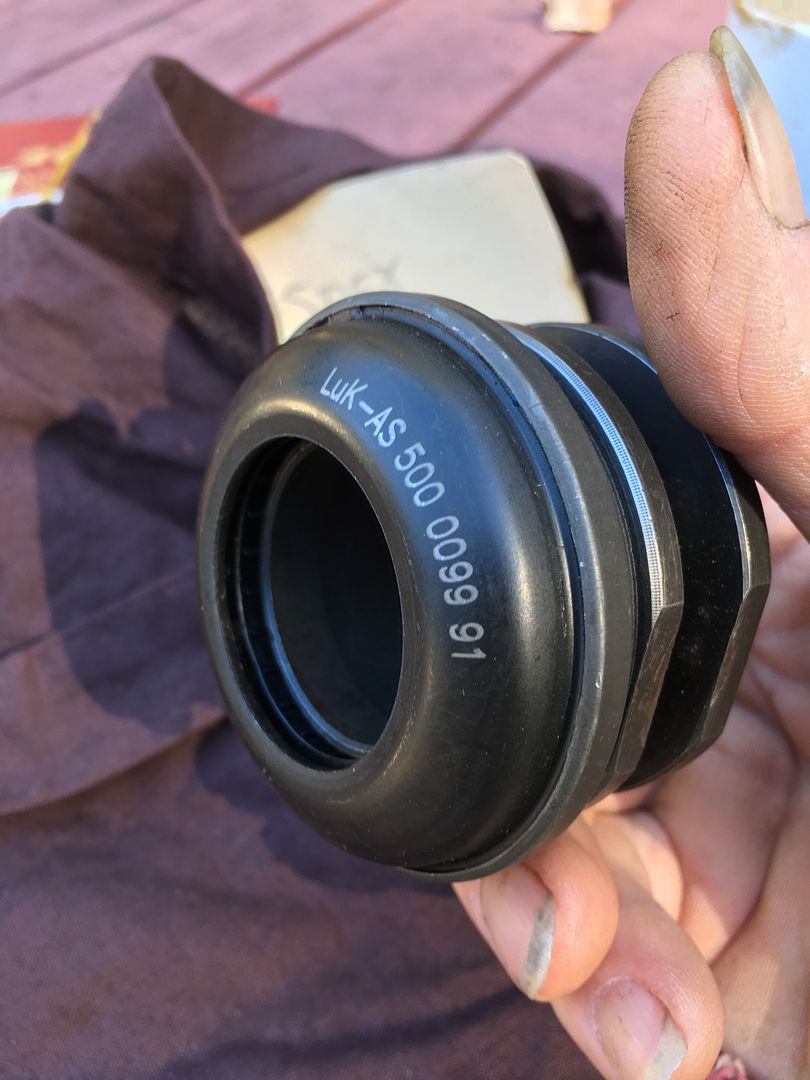
starting to reassemble the drivetrain again- got the clutch pack on- and investigating the final drive seals.

okydoky100716
closer to fitting the drivetrain back in place.
started figuring out the final drive seals- took one side out, replaced the seal/oring, and am trying to refit correctly......

closer101016
i have re-assembled the crane.
mabe i have seals in the output shafts of the transmission.
mabe i'll drop the drivetrain in this week(or today).

btsnpcs101116
got a bit of prep to the engine bay done- new motor mounts and other cleanup.

btwraindrps101516
placed drivetrain in chassis........ kinda shoehorned it in, as it seemed longer than what i took out.
my sling worked fine, and it went very smoothly, otherwise.
« Last Edit: Saturday,October 15, 2016, 01:58:11 PM by rascott »

Offline BDA

  • Super Member
  • *******
  • Joined: Jul 2012
  • Location: North Carolina
  • Posts: 9,506
Re: new member
« Reply #343 on: Thursday,September 22, 2016, 07:48:47 PM »
Hopefully, you'll have some smooth sailing after getting that done! Onward and upward to the next problem!

Offline rascott

  • Full Member
  • ***
  • Joined: Dec 2014
  • Location: california
  • Posts: 249
Re: new member
« Reply #344 on: Sunday,October 16, 2016, 06:55:13 PM »
i have developed doubts regarding the installation of the roll pins to fit the driveshafts to the gearbox transmission shafts.
should i drive the large pin first and follow with the small one(?) or figure on both together?
honestly, i'm having difficulty getting a pin to start......
once again, the "workshop manual" is brief in this process.......
otherwise things seem to go together well.
looks like the rainy season is starting up here.........having to dodge showers.